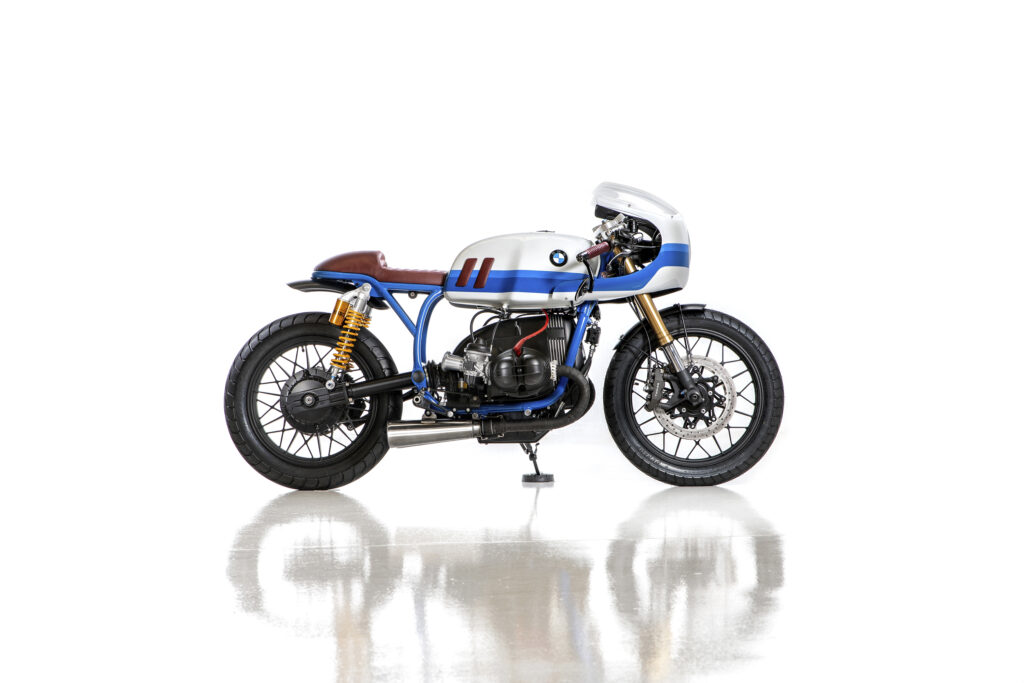
Changing the headlight on your BMW K100 motorcycle to a cool, stylish cafe racer style can make it look much better and work better, too. This guide will show you, step by step, How to Install a BMW K100 Cafe Racer Headlight, making it easy to do yourself.
What Parts and Tools Do You Need for Headlight Installation?
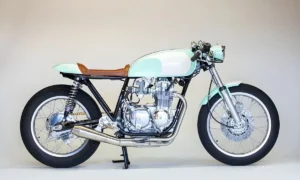
Which Headlight is Best for Your BMW K100 Cafe Racer?
To start this project, you’ll need a few essential things to ensure everything goes smoothly.
- 5.75 Headlight: A round 5.75-inch headlight is a popular choice for cafe racers because it looks good and works well. Make sure you pick a headlight that looks good on your bike and gives you enough light.
- Headlight Bucket/Housing: This is the cover that goes over the headlight, keeping it safe from rain, dust, and other things. It also makes the bike look neat and finished.
- Mounting Brackets: These brackets are super important for holding the headlight onto your bike. They come in lots of different styles, so pick ones that look good with your bike.
What Tools Will Make Your Installation Easier?
The electrical components are equally important in this installation process. You will need the following items:
- Wiring Harness Extension: Depending on how your bike’s wiring is set up, you might need to add extra length to the wiring harness so it can reach the new headlight position.
- Connectors: These are important for making strong connections with the electrical wires. Use good quality connectors to make sure everything works well and stays connected.
- Solder and Heat Shrink Tubing: Soldering makes the electrical connections strong, and using heat shrink tubing keeps the connections safe from water and damage.
What Tools Will Make the Installation Process Easier?
A well-prepared toolkit will make installing the headlight easier and faster. Ensure you have the following tools on hand:

- Socket Wrench Set: This is your go-to for loosening and tightening bolts. It’s essential for pretty much any assembly work you’ll be doing.
- Screwdrivers: Make sure you have both flathead and Phillips screwdrivers on hand. You’ll need these for various screws and adjustments.
- Wire Cutters/Strippers: These are crucial when you’re working with electrical wires. You’ll need them to cut the wires to length and strip off the insulation.
- Multimeter: This is an invaluable tool for checking electrical connections. It helps ensure that all your wiring is correct and safe.
- Drill: You might need a drill if you have to create custom brackets or make modifications to your setup. It’s always handy to have one around for any unexpected drilling needs.
How Should You Prepare Your Bike for the Headlight Installation?
Before you start installing anything, it’s important to get ready first:
- Disconnect the Battery: Safety first! Always start by disconnecting the battery to avoid any electrical accidents. The battery is usually under the seat or a side cover. Disconnect the negative terminal to cut off the power.
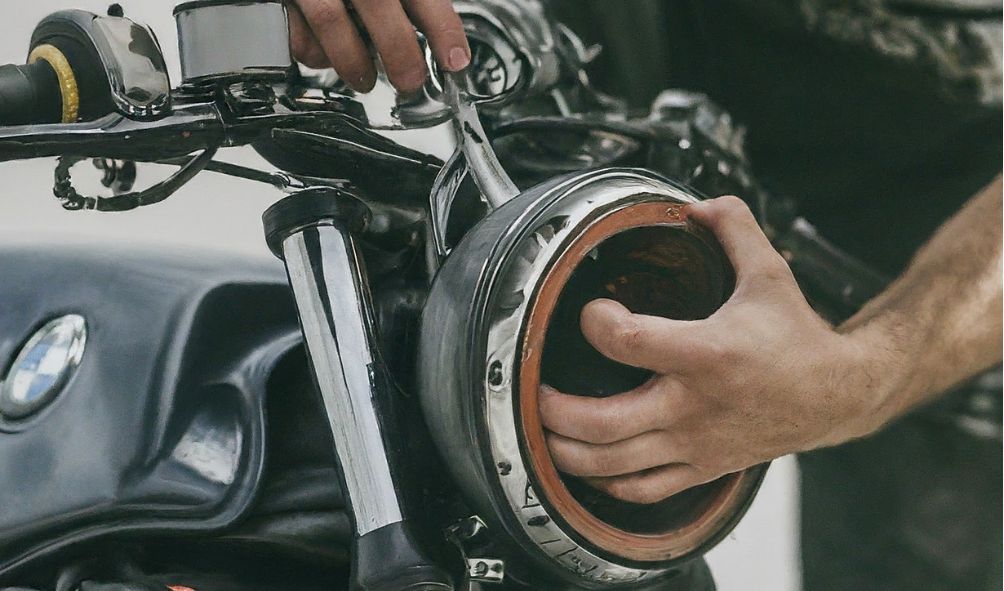
- Remove the stock headlight: Remove the old headlight. This usually involves unscrewing the bolts or screws holding it in place. Keep the screws and brackets—you might need them for the new headlight.
- Gather Parts and Tools: Before you begin, make sure you have all your parts and tools nearby. Being organized like this will save you time and keep you from getting frustrated. Lay everything out neatly in an easy-to-reach spot.
How Do You Install the Mounting Brackets for Your New Headlight?
With preparation complete, the next step is to install the mounting brackets:
- Follow Kit Instructions (if applicable): If your headlight comes with a mounting kit, follow the manufacturer’s instructions. They’ll tell you exactly how to install your specific headlight model for the best outcome.
- Custom Bracket Fabrication/Purchase: if you need special brackets for your bike, you have a few options. You can either make them yourself or buy ones that are already made to fit what you need. If you decide to make them, you’ll need a drill to put any holes in the right spots and make sure they line up with your bike’s frame.
What Steps Should You Follow for Proper Headlight Wiring?
Proper wiring is important for headlight functionality. Follow these steps to ensure a reliable connection:
- Using a Tool to Find Positive and Negative Wires: Get your multimeter ready. This tool helps you figure out which wire is positive (+) and which is negative (-) from the wires coming out of your bike. It’s super important to get this right so you don’t mess up your bike’s electrical system.
- Joining the Wires the Right Way: You have two options here:
- Connectors: These are like little clips that hold the wires together.
- Soldering: This means melting a special metal to join the wires permanently. It’s a bit trickier, but it makes a really strong connection.
- Here’s how to solder:
- Use the wire cutters to carefully remove a bit of the plastic covering from the ends of the wires.
- Twist the bare ends of the wires together tightly.
- Melt some solder onto the twisted wires to hold them together.
- Slide a piece of heat shrink tubing (like a little plastic sleeve) over the connection.
- Use a heat gun to warm up the tubing until it shrinks around the wires. This keeps everything safe and protected.
- Making Wires Longer (if needed): If the wires on your bike aren’t long enough, you can add extra wires to make them reach. Use connectors to join the old wires to the new wires, and remember to protect everything with heat shrink tubing.
How Do You Securely Mount the Headlight onto Your Bike?
With the wiring in place, it’s time to mount the headlight:
- Attaching the Headlight: Take the screws or bolts that came with your headlight and use them to attach the headlight to the bracket (the piece that holds it).
- Making Sure It’s in the Right Spot: Take a good look and make sure the headlight is in the middle and lines up with the rest of the bike. If it’s crooked, it won’t shine where it’s supposed to, and that’s not safe.
- Double Check Everything: Give the headlight a wiggle to make sure it’s on tight. If it’s loose, it could move around and cause problems. If you need to, adjust the bracket so the headlight points straight ahead.

How Do You Test and Adjust Your New Headlight?
The final steps involve testing and fine-tuning the headlight:
- Reconnect Battery: Reconnect the battery to power the electrical system. Attach the negative terminal back onto the battery.
- Test Headlight Functionality: Alright, now let’s turn on that headlight and make sure it’s working like it should. Flip the switch and see if it lights up. Try both the bright setting and the regular setting to make sure they’re both good. If you don’t see any light, let’s go back and double-check those wires – maybe something came loose.
- Adjust Headlight Aim: Alright, now let’s make sure that the headlight is shining right. You want it to light up the road ahead nice and bright, but not so high that it’s blinding anyone coming towards you. See those little screws on the headlight? Go ahead and gently turn them a bit at a time. Adjust the angle until it’s right.
Additional Considerations
- Check Your Fairing: If your bike has a fairing, make sure the new headlight fits with it. Sometimes, adjustments are needed.
- Look at the Wiring Diagram: Check the diagram for your bike’s wires. It helps with connecting things right and fixing electrical problems later.
- Get Help if Needed: If you’re not sure about installing the headlight, ask a mechanic. They can do it safely.
Here are some helpful things:
- YouTube Tutorials: Watch videos for easy steps on installing your headlight.
- Online Forums: Join forums where bikers talk. You can ask questions and get advice.
- Repair Manuals: Get a manual for details on your bike’s electrical system.
Why Are Repair Manuals Important for This Installation?
A repair manual specific to the BMW K100 can be a lifesaver. It will provide detailed information on the bike’s electrical system and other crucial components. These manuals are often available for purchase or download and are worth the investment for any serious DIYer.
By following this comprehensive guide, you’ll be well-equipped to install a new headlight on your BMW K100, transforming it into the cafe racer of your dreams. Enjoy the enhanced visibility and stylish appearance that a new headlight brings to your ride.