Table of Contents
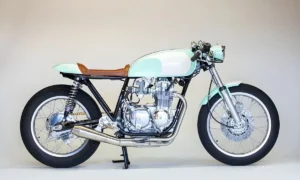
ToggleIf you’re anything like me, you get a huge kick out of customizing your bike. There’s nothing quite like the satisfaction of building something unique with your own two hands. One of my favorite projects has been creating a custom battery box for my cafe racer. It’s a fantastic way to make your bike stand out while also improving its performance.
Today, I’m excited to share my top 10 tips for building the perfect cafe racer custom battery box. I’ve been through this process a few times, and I’ve learned a lot along the way. My goal is to help you avoid some of the mistakes I made and get your project right the first time. So, let’s dive into it and get that battery box built!
Tip 1: Plan and Design Your Custom Battery Box
Before you start cutting metal or ordering parts, you need a solid plan. Trust me, a little planning goes a long way. Sketch out your design on paper or use some simple design software. Think about the size and shape of the battery box, where it will fit on your bike, and how it will look.
Key Points to Consider:
- Size: Make sure your battery box will fit in the space available on your bike.
- Placement: Decide where you want to mount it. Under the seat is a popular spot.
- Aesthetics: How do you want it to look? Will it be a standout feature or blend in?
I always start with some rough sketches to get my ideas flowing. Then, I measure the space on my bike and tweak my design accordingly.
Tip 2: Choose the Right Battery
Choosing the right battery is crucial. There are a few types you can go for, but I recommend lithium-ion or AGM (Absorbent Glass Mat) batteries.
Battery Types:
- Lithium-Ion: Lightweight, compact, and powerful. Great for custom builds but a bit pricier.
- AGM: Reliable and cost-effective. A bit heavier but still a solid choice.
When picking a battery, think about its size, weight, and power capacity. Make sure it fits your design and meets your bike’s needs. A good battery will not only make your bike run better but also last longer.
Read More: [How to Choose the Best Cafe Racer Battery | Expert Tips & Recommendations]
Read More: [How to Hide Battery on Cafe Racer?]
Tip 3: Select the Right Materials for Custom Battery Box Build
The materials you use for your battery box are important for both durability and looks. Common choices include aluminum, steel, and fiberglass.
Material Choices:
- Aluminum: Lightweight, easy to work with, and resists corrosion. My personal favorite.
- Steel: Strong and durable but heavier and harder to shape.
- Fiberglass: Great for custom shapes but needs some skill to handle.
I usually go for aluminum because it’s easy to work with and looks great when polished or painted. Make sure to get your materials from a reliable source to ensure quality.
Tip 4: Gather Your Tools and Equipment
Having the right tools makes the job a lot easier. Here’s a list of what you’ll need:
- Metal cutters or a jigsaw
- Welder (MIG or TIG)
- Drill and drill bits
- Clamps and a workbench
- Safety gear (gloves, goggles, ear protection)
- Measuring tape and markers
Safety First:
Always wear protective gear. Gloves, goggles, and ear protection are a must. Make sure your workspace is well-ventilated, especially when welding.
Tip 5: Fabricate the Custom Battery Box
Now comes the fun part – building your battery box! Start by cutting and shaping your material based on your design. If you’re using aluminum or steel, a metal cutter or jigsaw will do the job. For welding, I recommend a MIG or TIG welder.
Fabrication Tips:
- Cutting: Measure twice, cut once. Precise cuts will save you a lot of hassle.
- Welding: MIG welding is easier for beginners, but TIG welding gives cleaner results. Practice on some scrap metal if you’re new to welding.
- Shaping: Use a bending tool or vise to shape your metal.
If welding isn’t your thing, you can bolt the pieces together. Just make sure the connections are strong and secure.
Tip 6: Mounting the Custom Battery Box
Mounting your battery box securely is crucial for safety and performance. There are a few ways to mount it, including frame mounting and under-seat mounting.
Mounting Methods:
- Frame Mounting: Simple and straightforward. Attach the battery box to the frame of your bike.
- Under-Seat Mounting: Keeps the battery out of sight for a cleaner look but can be a bit trickier to install.
Make sure the battery box is securely attached and doesn’t interfere with other components. Adding rubber mounts or vibration dampeners can help protect the battery from shocks and extend its life.
Tip 7: Wiring and Electrical Connections
Wiring your battery correctly is essential for your bike’s electrical system to work properly. Start by checking your bike’s wiring diagram.
Wiring Tips:
- Battery Terminals: Connect the positive and negative terminals to the bike’s electrical system.
- High-Quality Wires: Use good-quality wires and connectors to avoid electrical issues.
- Fuse: Adding a fuse helps protect the system from short circuits.
If you’re not confident in your wiring skills, it’s a good idea to consult a professional or look up detailed guides online.
Tip 8: IInsulate and Ventilate Your Custom Battery Box
Proper insulation and ventilation are key to keeping your battery in good shape. Insulating the battery box helps protect it from heat and vibration.
Insulation and Ventilation Tips:
- Insulation: Use materials like foam or rubber for insulation. These materials are easy to work with and effective.
- Ventilation: Ensure there are enough ventilation holes or slots to allow heat to escape. This prevents overheating and prolongs battery life.
Even if you’re using a sealed battery, it’s better to be safe and provide proper ventilation.
Tip 9: Add Finishing Touches
With your battery box built and mounted, it’s time for the finishing touches. Painting and finishing the battery box will give it a polished, professional look.
Finishing Tips:
- Preparation: Clean the battery box thoroughly before painting. Remove any grease or debris.
- Priming: Apply a primer to create a smooth base for the paint.
- Painting: Choose a paint that matches your bike’s color scheme or go for a contrasting color to make it stand out. Apply multiple thin coats for the best finish.
Adding custom touches like logos or decals can really make your battery box unique. Make sure everything is securely fastened and looks great.
Tip 10: Test and Troubleshoot
The final step is testing and troubleshooting your custom battery box. Start by checking all electrical connections and ensuring the battery is charging properly.
Testing and Troubleshooting:
- Electrical System: Test all electrical components like lights, horn, and other features.
- Battery Charge: Make sure the battery is holding a charge and there are no connection issues.
If you encounter any problems, address them right away. Common issues might include loose connections or inadequate insulation. Regular maintenance and inspections will help keep your battery box in top condition.
Building a custom battery box for your cafe racer is a rewarding project that enhances both the look and performance of your bike. With careful planning, the right materials, and proper techniques, you can create a battery box that’s both functional and stylish. Remember, take your time and pay attention to detail. Following these tips will help you get the best results.
I’d love to hear about your projects and see your finished builds, so feel free to share your experiences in the comments or on social media. Happy building!
FAQs
What materials should I use for a custom battery box?
Use aluminum for its lightweight and ease of shaping, steel for strength and durability, or fiberglass for custom shapes.
Which battery is best for my cafe racer?
Choose lithium-ion for a lightweight and powerful option, or AGM for reliability and cost-effectiveness.
What tools do I need to build a custom battery box?
You’ll need metal cutters or a jigsaw, a welder (MIG or TIG), a drill, clamps, a workbench, and safety gear like gloves and goggles.
How do I ensure proper insulation and ventilation?
Use foam or rubber for insulation and include ventilation holes to allow heat to escape, preventing overheating.
What common issues might I face and how can I fix them?
Common issues include loose connections and inadequate insulation. Ensure all connections are tight and properly insulated, and perform regular maintenance checks.