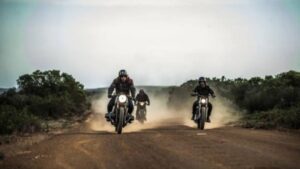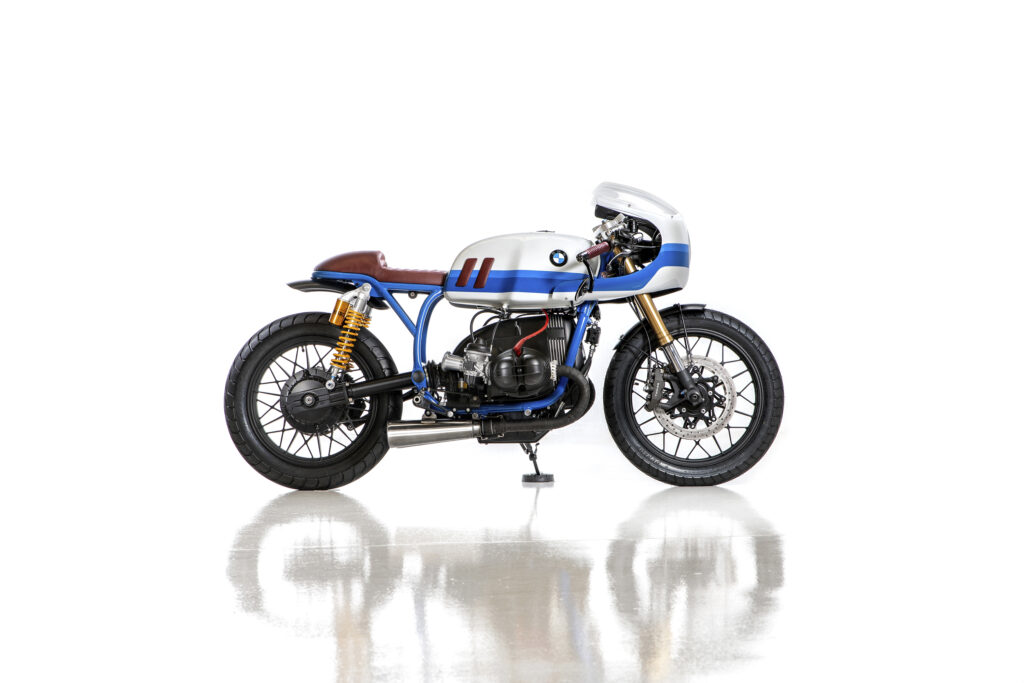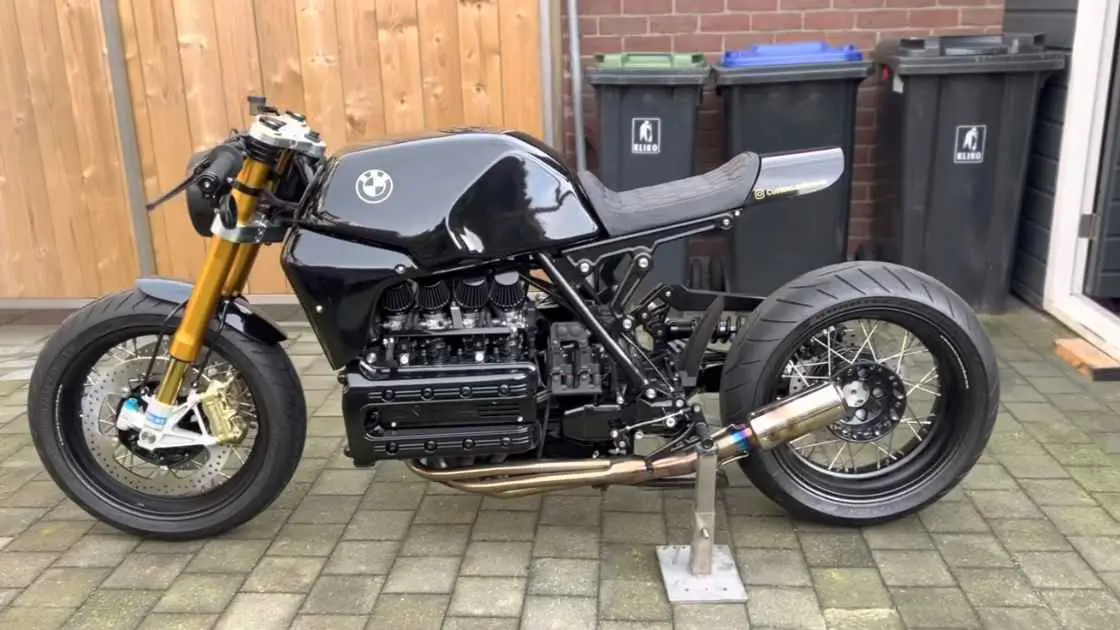
Are you thinking about turning a BMW K1100 into a cafe racer? Good choice! The BMW K1100 is not as famous in the cafe racer world, but it’s a great bike to customize. It has a strong build, a powerful engine, and a unique look. Changing this classic touring bike into a sleek cafe racer is a fun challenge. It takes careful planning and smart changes. This guide will show you everything you need to know. You’ll learn why the K1100 is a great bike for a cafe racer, how to find parts, what changes to make, and how to keep it legal on the road. By the end, you’ll be ready to turn your K1100 into a stunning cafe racer that shows off your style. Let’s dive in!
Why the BMW K1100 is a Good Choice for a Cafe Racer

A Quick History of the K1100
Before we get into the steps to build a BMW K1100 cafe racer, let’s learn a bit about the K1100’s background. Knowing about the bike will help you make smart choices on what to keep, what to change, and how to build it. The BMW K1100 is part of the famous K series, made from the late 1980s to the mid-1990s. It’s often called the “Flying Brick” because of its flat-four engine that lies on its side. This was one of BMW’s creative designs that changed motorcycle engineering.
The K1100 was first made as a touring bike. It is known for being strong, comfortable, and powerful, which makes it a favorite for long rides. Its sturdy frame, strong engine, and reliable parts make it a good choice for customizing. It may not look like a cafe racer at first, but it has a great base to build on. Knowing this history is key because it guides the choices you’ll make during the build.
Pros and Cons of Using the K1100 for a Cafe Racer
Building a BMW K1100 cafe racer has both good points and challenges. Knowing these can help you decide if this bike is right for your project.
Pros:
- Strong Engine: The K1100 has a 1,092cc inline-four engine. It is powerful and smooth, which is great for a cafe racer. It has good torque, which makes it ideal for both city and highway rides.
- Unique Look: The “Flying Brick” engine design stands out. When you polish it and show it off, it becomes a striking feature of your cafe racer.
- Affordable and Easy to Find: The K1100 is cheaper than other classic bikes like the BMW R series or old Triumphs. This means you have more money to spend on customizing.
- Strong Frame: The K1100’s frame is tough. It’s built to carry weight and handles well. With some changes, it can be shaped to fit the light, simple style of a cafe racer.
- Parts Are Easy to Get: BMW made a lot of K series bikes, so it’s not hard to find replacement parts, both original and aftermarket. This makes finding parts for your custom build easier.
Cons:
- Heavy and Large: The K1100 is a touring bike, so it is heavier than other cafe racer bases like the BMW R-series or Honda CB series. Making it into a light cafe racer will take a lot of work.
- Complex Electronics: The K1100 has more advanced electronics compared to older bikes. If you are not used to working with bike electrics, simplifying the wiring and updating the electronics can be tough.
- Limited Custom Parts: While you can find parts for the K1100, there aren’t as many options specifically for cafe racer builds. More popular models like the Honda CB750 or BMW R series have more choices. You may need to get creative with your modifications.
- Wide Engine Design: The “Flying Brick” engine is different, but it also brings some challenges. The engine’s width can limit some design choices, especially if you want a very slim, simple look.
Overall, the good points often outweigh the bad ones, especially if you like a challenge. Turning this strong bike into a sleek, stylish machine is worth the effort. If you want to build something unique, the BMW K1100 is a great choice for your cafe racer project.
Finding and Preparing Your Donor Bike
How to Find a BMW K1100
When looking for a BMW K1100, you have several options. The K1100 is not as rare as some older bikes, but it’s also not as common as a Honda CB series. How you find the right bike will depend on your budget, where you live, and how much effort you want to put into searching.
Here are some good places to look:
- Online Marketplaces: Websites like Craigslist, eBay Motors, Cycle Trader, and Facebook Marketplace are great places to start. These sites let you search by location, price, and condition. Prices can vary a lot based on the bike’s mileage, how well it’s been kept, and any changes or upgrades it already has.
- Local Dealerships and Ads: Sometimes, a good find is waiting at a local dealership or in the ads of your local newspaper. Dealerships might have used or trade-in K1100s in good shape. It can be worth visiting a few to see what they have.
- Auctions: Online auction sites like Copart or Bring a Trailer can also be good places to look. But these options can be riskier since you might not get to check the bike closely before buying.
- Specialty Forums and Groups: Forums like BMW MOA (BMW Motorcycle Owners of America) and other BMW or cafe racer groups often have classified sections. Members here sell bikes, and they are usually fans who take good care of their bikes and know their condition well.
- Bike Shows and Swap Meets: If you have the time, going to local bike shows, swap meets, or motorcycle events can help you find a K1100. Enthusiasts often bring bikes to these events, and you might find a deal that isn’t listed online.
When searching for a K1100, always focus on the condition of the engine, frame, and major parts. A well-kept bike with a good service history is better than one that has been neglected or heavily modified. This gives you a solid base to start your build.
First Check and Assessment
Once you find a BMW K1100 that you like, it’s time to inspect it closely. You don’t want to end up with a bike that’s more trouble than it’s worth. Here’s a simple guide on what to check:
- Engine and Transmission: Start by checking the engine. If you can, start the bike and listen for any strange sounds—like clunks, knocks, or loud valve noise. These could mean there are problems. Ask for maintenance records showing regular oil changes, valve adjustments, or other key services. The transmission should shift smoothly without grinding or resistance.
- Frame Integrity: Look closely at the frame for any damage or rust. Cracks, bends, or rust in important areas (like the head tube or where the subframe mounts) can be a big issue. A strong frame is important for safety and for making changes when building a cafe racer.
- Electronics and Wiring: You might plan to redo the wiring and electronics, but it’s still good to check them. Look for worn-out wires, rusty connectors, and signs of messy wiring work. This will help you see how much work you’ll need to do on the electrical system.
- Suspension and Brakes: Even if you plan to upgrade these, it’s good to know their current state. Look for leaks in the fork seals, rust, or wear on the fork tubes, and wear in the rear shock. Check the brakes for rotor wear, pad thickness, and the condition of the brake lines.
- Fuel System and Exhaust: Check the fuel tank for rust or leaks. The K1100’s fuel pump and lines can be trouble spots, especially if the bike has been sitting for a while. The exhaust should be free of major rust and damage, but you’ll likely replace it with a custom system.
- Bodywork and Looks: You will likely remove most of the original bodywork, but the tank’s condition is important. Dents, rust, or corrosion inside the tank can mean more work than it’s worth. Also, check other parts like the seat, side panels, and fairings for any pieces you might want to keep or sell.
By doing a careful inspection, you will know what you’re getting into and whether the bike is a good buy. The goal is to start with a bike in good shape so you can focus on customizing it instead of fixing major problems.
Stripping Down the Bike
Getting Ready to Take Apart the Bike
Now that you have your BMW K1100, it’s time to strip it down. This is when the real change begins. Taking apart the bike lets you check everything closely, fix any issues, and plan the changes needed to create the perfect cafe racer look.
Before you start, make sure you have the following:
- Workspace: You need a clean, bright workspace, like a garage or workshop. You should have enough room to move around the bike, lay out parts, and organize tools.
- Tools: Basic hand tools like wrenches, socket sets, screwdrivers, pliers, and a rubber mallet are needed. A torque wrench, impact driver, and special tools like a bearing puller or chain breaker will also help.
- Organization System: As you take the bike apart, you will have many parts and bolts. Use labeled bags, boxes, or trays to keep everything in order. Take photos and label parts to remember how they go back together.
- Safety Gear: Wear safety glasses and gloves. Keep a fire extinguisher nearby. You are working with materials that can be dangerous, so safety is key.
- Service Manual: A BMW K1100 service manual is very useful. It will give you torque specs, steps for taking things apart, and other details to help you.
Step-by-Step Guide to Taking Apart the Bike
Taking apart a BMW K1100 takes time and a clear plan. Here is a simple guide:
- Remove the Fairings and Seat: Start by taking off the fairings, if the bike has them, and the seat. They are usually attached with bolts and clips. Keep these parts safe. Even if you don’t want them, you can sell or trade them.
- Drain Fluids: Empty all fluids, like engine oil, coolant, brake fluid, and fuel. Dispose of these fluids properly. This step makes the bike easier to work on and prevents spills.
- Remove the Battery and Electrical Parts: Disconnect and remove the battery. Then, unplug electrical parts like the ECU, relays, and other electronics. This will help later when you simplify the wiring.
- Take Off the Fuel Tank and Airbox: The fuel tank is usually held by a few bolts and can be removed after disconnecting the fuel lines. The airbox is under the tank and may need more steps to remove.
- Strip Down the Exhaust and Intake System: Take off the exhaust headers, mufflers, and any intake parts that are still on. This is a good time to check the exhaust system if you plan to reuse any parts.
- Remove the Wheels and Brakes: Use a motorcycle stand or jack to lift the bike and remove the wheels. Then, disconnect the brake calipers, brake lines, and master cylinders. Keep all the parts organized if you plan to reuse or sell them.
- Disassemble the Suspension: Remove the front forks by loosening the triple tree clamps and sliding them out. The rear suspension can be removed by unbolting the shock from the swingarm and frame. Check these parts for wear and damage.
- Pull the Engine: This is the hardest step and usually needs a helper. The K1100 engine is heavy and must be carefully supported as you unbolt it from the frame. Use an engine hoist or a strong jack to lower it to the ground slowly.
- Check the Frame: With the engine out, you are left with the frame and wiring. This is the time to check the frame for cracks, rust, or any damage that needs fixing.
By the end of this process, you’ll have a fully stripped BMW K1100, ready to customize. It might seem hard at first, but taking it step-by-step makes it easier. Plus, you’ll learn a lot about your bike as you go!
Frame Modifications and Fabrication
Understanding Frame Basics
The frame is more than just the bike’s skeleton; it controls how the bike rides, handles, and feels. When building a BMW K1100 cafe racer, changing the frame is key to getting that classic look—clean lines, a shorter tail, and a more aggressive riding position. But before you start cutting and welding, it’s important to know some basics about how a motorcycle frame works.
Key Points to Know:
- Rake and Trail: These two things affect how a bike handles. The rake is the angle of the front fork. A steeper rake makes the bike handle better, while a relaxed rake gives stability at high speeds. The trail is the distance between where the front wheel touches the ground and where the steering line meets the ground. Changing the front end (like lowering the front forks or changing the wheel size) can affect both rake and trail.
- Wheelbase: This is the distance between the front and rear wheels. A shorter wheelbase makes a bike more agile, which is good for a cafe racer. But shortening it too much can make the bike unstable at high speeds. Balance is key.
- Subframe Design: The subframe is where you can be creative. Classic cafe racers have a “humped” seat with a short tail. Changing the subframe lets you get this look. It also reduces weight and cleans up the back of the bike.
- Weight Distribution: You want to balance the bike’s weight for good handling. Lowering the center of gravity and spreading the weight between the front and back will help the bike feel balanced.
Knowing these basics will help you decide how to change the frame for the look and ride you want. Always put safety and good handling first when making changes.
How to Modify the Subframe
Changing the subframe is a big part of turning a BMW K1100 into a cafe racer. The original K1100 subframe is made for comfort and stability, which is good for long rides but not for a simple, sleek cafe racer look. You will need to shorten, simplify, and maybe lower it to get that classic cafe racer style.
Steps to Change the Subframe:
- Plan Your Design: Decide what style you want for the back of your bike. Are you aiming for a “bum stop” seat, a flat tracker-style seat, or something more modern? Draw your ideas or use software to see how the new subframe will look.
- Mark the Cut Points: Before cutting, mark where you want to shorten the subframe. Most builders cut it just behind the shock mounts to give the bike a shorter, tougher look. Use masking tape to mark where you will cut for a straight line.
- Cut and Weld: Use an angle grinder or a saw to carefully cut the subframe at the marked points. Double-check your measurements before cutting! After cutting, weld new brackets or supports to hold the new seat and any other parts. If you’re not good at welding, have a professional do it to make sure it’s strong and safe.
- Build or Buy a New Seat: Cafe racer seats often have a curved or “bum stop” design. You can buy ready-made seats for the BMW K series or make your own using a metal seat pan, foam, and leather or vinyl. Make sure the seat is comfortable and fits your riding style.
- Install Rear Loop and Seat Mounts: Adding a rear loop to the subframe gives the bike a finished look and supports the seat and other parts like taillights. The loop is usually welded onto the cut subframe and must be aligned right to keep the bike even.
- Test Fit Everything: Before painting or coating the frame, test fit the seat, tail section, and other parts like lights and license plate brackets. Make sure everything fits well and looks how you want.
- Reinforce if Needed: Make sure the modified subframe is strong, especially if you made big changes. Add more welding or braces to keep it strong and durable.
By the end of this process, your BMW K1100 will look more compact and aggressive. This sets the base for the rest of your cafe racer build.
Adding a New Seat and Tail Section
Now that your subframe is changed, it’s time to add the new seat and tail section. These are key parts that give a cafe racer its unique style. The right seat and tail can change the bike’s look completely and make it stand out.
Choosing the Right Seat:
- Style and Comfort: Cafe racer seats come in different styles, from classic hump-back seats to flat tracker seats. Think about the look you want and how comfortable you want it to be. For longer rides, a bit more padding might be better, even if it makes the seat look bigger.
- Materials and Upholstery: Seats are usually covered in leather or vinyl. Leather gives a high-end, vintage look, while vinyl is more weather-resistant and easier to care for. Pick a material that fits your riding conditions and how much upkeep you want.
- Mounting the Seat: After picking your seat, mount it to the modified subframe. You may need to make custom brackets or drill new holes for a secure fit. Make sure the seat is comfortable and matches the lines of the bike.
Customizing the Tail Section:
- Installing a Cowl: Many cafe racers have a rear cowl that covers the back of the seat for a clean look. You can make a custom cowl from fiberglass or metal, or buy one made for your bike model.
- Lighting and Indicators: Install the rear lights and turn signals. LED lights are a good choice because they are bright and use less power. A small taillight that blends into the rear loop or seat cowl gives a cleaner look.
- License Plate and Bracket: Choose where to place the license plate—either in the traditional rear spot or on the side for a more custom look. Make sure it is securely mounted and follows local rules.
By this stage, your K1100 will start to have the classic, stripped-down look of a cafe racer. The new, sleek back end will not only look great but also improve how the bike handles and rides.
Suspension Upgrades
Upgrading the suspension on your BMW K1100 is key to getting the handling you want. The stock suspension is made for comfort on long rides. It might not give the firm and responsive feel needed for a sportier style.
Front Suspension
The front suspension is very important in your cafe racer build. It affects how the bike handles, rides, and feels. The stock BMW K1100 front forks are good for touring, but upgrading or tuning them will help a lot for a cafe racer.
Options for Upgrading the Front Suspension:
- Fork Rebuild: If you are on a budget or want to keep the bike mostly original, a simple fork rebuild is a good option. Replace the fork seals, bushings, and oil with new parts. Adding stiffer springs and thicker fork oil can also help. This makes the front end firmer and reduces dive when braking.
- Upgraded Fork Internals: For a better setup, you can change the inside fork parts with aftermarket kits. Brands like Racetech or Progressive Suspension offer kits that improve damping and spring rates. This makes your front suspension feel like a modern sportbike.
- Fork Swap: For the best upgrade, you can swap out the entire front end for modern upside-down (USD) forks. Forks from bikes like the Yamaha R6 or Suzuki GSX-R are popular choices. This upgrade gives better handling, braking, and a modern look. But, it needs custom triple trees, caliper mounts, and maybe changes to the steering stem.
- Clip-On Handlebars: With front suspension upgrades, think about adding clip-on handlebars. They lower the rider’s position and give the bike a more aggressive look. Clip-ons are common in cafe racer builds and improve the sporty feel of your K1100.
Rear Suspension
Upgrading the rear suspension is also important for better ride quality and handling. The stock K1100 rear shock, made for touring comfort, is often too soft for a cafe racer.
Options for Rear Suspension Upgrades:
- Upgraded Rear Shock: Replacing the stock shock with a modern, adjustable one is the easiest and best upgrade. Brands like Öhlins, Wilbers, or Hagon make shocks designed for the BMW K1100. An adjustable shock lets you set the right balance between comfort and performance.
- Adjusting Ride Height: You may want to raise or lower the rear end to get the look and handling you want. Lowering the rear gives the bike a more “squat” cafe racer look. Raising it can improve cornering and agility.
- Dual Shock Conversion: For a retro look, some builders switch to a dual-shock setup instead of the monoshock. This is more for looks than performance but can give a unique style. Be aware that it requires big changes to the frame.
- Swingarm Modifications: A more advanced option is to change or replace the swingarm with a lighter, stronger one. This is a big job but can reduce weight and improve stability in the rear.
By upgrading the suspension parts, your BMW K1100 cafe racer will not only look great but will also handle much better. A firm, responsive suspension will make a big difference when taking sharp turns or making quick moves in city traffic.
Wheels, Tires, and Brakes
Choosing the Right Wheels and Tires
Choosing the right wheels and tires for your BMW K1100 cafe racer is not just about looks. They are important for how the bike performs, handles, and stays safe. The right choice will match the cafe racer style and give you the grip and stability you need for fun rides.
Wheel Choices:
- Stock Wheels with Changes: The original K1100 wheels work well, but they might not have the right cafe racer look. You can make them look better by powder-coating them black or painting them in a retro style.
- Spoked Wheels: For a more classic look, think about switching to spoked wheels. You’ll need special hubs or adapters because the K1100 came with alloy wheels. Spoked wheels will give your bike a vintage feel.
- Lightweight Aftermarket Wheels: For better performance, consider lightweight aftermarket wheels. They reduce weight, which helps with handling and speeding up. These wheels can be costly but worth it if you want a bike built for speed.
Tire Choices:
- Classic Cafe Racer Tires: Tires like the Avon Roadrider or Dunlop K81 have a vintage look with modern performance. They grip well in both dry and wet conditions and have the rounded shape typical of cafe racers.
- Sport Tires: If you like a more aggressive riding style, try sport-touring tires like the Michelin Pilot Road or Pirelli Diablo Rosso. They offer great grip and handling but may not have the classic look.
- Dual-Purpose Tires: If you want to ride both on and off-road, dual-purpose tires are a good option. They are versatile and durable, but they might not perform as well on regular roads.
Brake System Upgrade
Upgrading the brakes is one of the most important safety changes you can make to your BMW K1100 cafe racer. The original brakes are fine for touring, but for a cafe racer, you need brakes that are sharper and more responsive.
Upgrading the Brake Parts:
- New Brake Rotors and Pads: Start by upgrading to better brake rotors and pads. Wavy or slotted rotors cool down faster and improve braking. Match them with sintered or semi-sintered pads for stronger stopping power.
- Braided Steel Brake Lines: Replace the stock rubber brake lines with braided steel ones. This upgrade is quick and affordable. It makes the brake feel firmer and more responsive because steel lines don’t stretch like rubber.
- Upgraded Calipers: For the best results, consider upgrading to multi-piston calipers from brands like Brembo, Nissin, or Tokico. These provide more force, even pad wear, and better overall braking.
- Master Cylinder Upgrade: An upgraded master cylinder with an adjustable lever gives better control and feedback. This allows harder braking with more control. Make sure it matches any new calipers you install.
- ABS Considerations: The BMW K1100 had ABS as an option. If you keep it, make sure all upgrades work with the ABS system. If you remove the ABS, you’ll need to adjust the brake lines and ensure it is safely removed.
Upgrading the brakes will not only make your cafe racer safer but will also boost your riding confidence. When you speed up and take corners, knowing your brakes are up to the task is key.
Engine Tuning and Performance Upgrades
For many cafe racer fans, the engine is the heart of the build. The BMW K1100’s engine, called the “Flying Brick” for its shape, is known for being strong and reliable. But, to turn your bike into a true cafe racer, you’ll want to boost both its looks and performance with a few smart upgrades.
Engine Overhaul and Maintenance
Before you start making performance changes, it’s important to make sure your engine is in great shape. A well-kept engine is a good base for any upgrades.
Steps for an Engine Overhaul:
- Basic Engine Service: Start with the basics. Change the engine oil and filter, replace the spark plugs, and check the air filter. These simple tasks are often missed but are key for keeping your engine healthy.
- Valve Clearance Adjustment: Over time, the gaps in the valves can change, affecting how the engine works. Adjusting the valve gaps on the BMW K1100 is fairly easy and can make the engine run smoother.
- Coolant System Check: The K1100 has a liquid-cooled engine. This means the cooling system must work well to avoid overheating. Flush the coolant, check hoses for leaks, and make sure the radiator is clear and not damaged.
- Fuel System Check: The fuel injectors on the K1100 are very important. Clean or replace them to ensure good fuel flow. Check the fuel pump and filter too, so the engine gets clean fuel without problems.
- Timing Chain and Tensioner Check: The timing chain and tensioner control the engine’s timing. Worn parts here can cause engine damage. Replace them if they show signs of wear.
- Compression Test: A compression test can show the health of the engine’s inside parts. Low compression in any cylinder might mean worn-out rings, a bad head gasket, or other problems that need fixing.
Doing these steps will help your engine run smoothly and efficiently. Once you have a strong base, you can focus on boosting performance.
Performance Mods
Now, let’s look at ways to get more power, torque, and speed from your BMW K1100 engine. These changes can make your cafe racer more exciting to ride.
Key Performance Upgrades:
- Upgraded Exhaust System: A custom exhaust is a popular upgrade. It can reduce weight and improve exhaust flow, giving you more power and a better sound. A 4-into-1 system offers a classic cafe racer look and top performance. Remember to check local noise rules when picking an exhaust.
- Air Intake Changes: Pairing a new exhaust with a better air intake helps the engine “breathe” better. Changing the stock airbox for pod filters or a high-flow air filter can boost airflow and power. This might need tuning to avoid running lean.
- ECU Tuning or Reflashing: The K1100’s fuel injection system can be tuned for more power, better throttle response, and improved fuel use. You can have the stock ECU remapped or buy an aftermarket ECU with more tuning options. A pro dyno tune is best for top performance and safety.
- Performance Camshafts: For bigger gains, think about performance camshafts. They offer more lift and duration, boosting power, especially at high RPMs. Note that new camshafts might also need upgraded valve springs and other parts.
- Lightweight Flywheel and Clutch: A lighter flywheel can make the engine respond faster, making your bike quicker off the line. A high-performance clutch can handle more power and offer smoother engagement.
- Upgraded Ignition System: An upgraded ignition system can give a stronger spark, leading to better combustion and power. Consider high-performance coils, plug wires, and a programmable ignition module.
- Big Bore Kit: For those who want even more, a big bore kit can increase engine size, giving a big boost in power and torque. This is a big job that needs a full engine rebuild but can be very rewarding.
- Weight Reduction: While not a direct engine mod, reducing the bike’s weight makes the engine’s power feel stronger. Consider light parts like a lithium-ion battery, carbon fiber bodywork, or alloy parts.
These upgrades will make your BMW K1100 a faster, more responsive bike that’s fun to ride and great to look at. Always balance the desire for more power with the need for reliability, especially if you ride often.
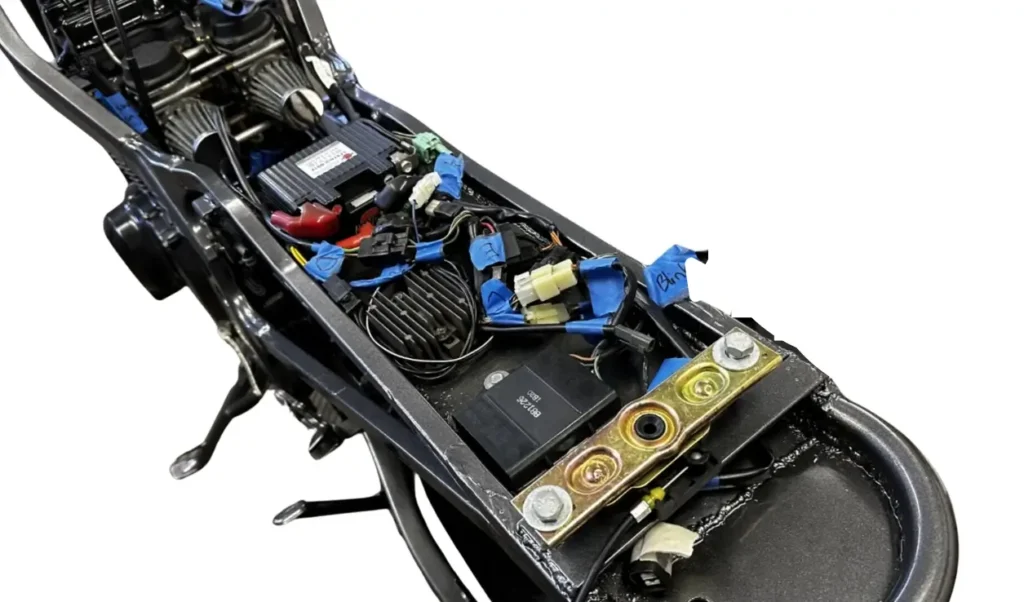
Electrical and Wiring Overhaul
Upgrading the electrical system is a key step when turning a BMW K1100 into a custom cafe racer. The bike’s original wiring is complex and made for touring bikes with many electronics and sensors. For a cafe racer, you need to simplify the wiring, improve parts, and maybe add some new features.
Simplifying the Wiring
The stock wiring on a BMW K1100 is too complex for a cafe racer’s simple design. Making the wiring simpler will give the bike a cleaner look, reduce weight, and may make it more reliable by removing unnecessary parts.
Steps to Simplify the Wiring:
- Plan the New Electrical Layout: Decide which electrical parts to keep, add, or remove. The basics are headlights, taillights, turn signals, and ignition. If you want to add a digital speedometer or GPS, include those too.
- Remove the Existing Wiring: Take out the old wiring carefully. Label any wires you plan to use again. Check all wires and connectors for damage or rust.
- Make a New Wiring Diagram: Draw a simple diagram for your new wiring. This will help you see how it all fits together and make the process easier.
- Use Quality Parts: When making the new wiring, use good-quality automotive wiring, heat shrink tubing, and weatherproof connectors. This will ensure the system lasts longer.
- Install a Digital Control Unit: A digital unit like the Motogadget M-Unit makes wiring easier. It centralizes the bike’s electrical parts and allows easy use of modern features like LED lights, digital displays, and keyless start. It’s smaller and simpler to wire than old fuse boxes.
- Test Everything: Once the new wiring is done, test all parts before putting the bike back together. Make sure everything works—headlights, turn signals, horn, and more—to avoid problems later.
Modernizing the Electrical System
Besides simplifying the wiring, modernizing the electrical system can boost the performance and look of your cafe racer.
Modern Electrical Upgrades:
- LED Lighting: Replace old bulbs with LED ones. LEDs use less power, are brighter, and last longer. Consider a modern LED headlight with built-in turn signals for a clean look. For the taillight, a small LED unit can be placed on the seat or rear loop.
- Digital Instrument Cluster: Replace the bulky stock gauges with a sleek digital unit. Options like the Motogadget Motoscope or Koso digital displays offer modern features like GPS speedometers and gear indicators.
- Lithium-Ion Battery: A lithium-ion battery is lighter and smaller than a regular lead-acid battery. This makes it easier to hide, giving the bike a cleaner look.
- Keyless Ignition: For a modern touch, think about a keyless ignition or an RFID system. These are secure, easy to use, and add a cool factor to your build.
- Charging Ports and GPS Integration: If you plan to take long trips, add USB ports for charging phones or GPS devices. Installing these neatly will make your cafe racer more practical and modern.
By upgrading the electrical system, you create a cleaner, more reliable setup while adding useful features and style to your build.
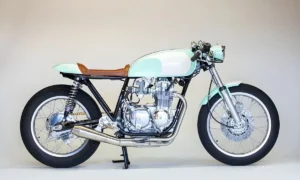
Custom Paint and Finishing Touches
After upgrading the mechanical and electrical parts, it’s time to focus on the bike’s look. The paint and finishing touches are where you can make your BMW K1100 cafe racer stand out and show your style.
Choosing the Right Color Scheme
Picking the right colors is one of the most fun parts of the build. The right colors can highlight the bike’s shape and make it unique.
Tips for Choosing a Color Scheme:
- Think About Classic Colors: Classic cafe racers often use colors like British Racing Green, Jet Black, Candy Red, or Metallic Silver. These give a vintage, timeless look that fits the cafe racer style.
- Go Bold for a Modern Look: If you want a fresh, eye-catching look, choose bold colors like Matte Grey, Neon Yellow, or Pearl White. These bring a modern feel to the bike.
- Try Two-Tone or Striped Designs: Two-tone colors or racing stripes can add depth and a sense of speed. Popular pairs are black and gold, silver and blue, or red and white. Choose based on the look you want.
- Match Colors with Seat and Frame: Make sure the colors match the seat and frame. A good match will make the bike look more polished and well-designed.
- Add Custom Decals and Graphics: Custom decals, pinstriping, or vintage logos can give a special touch. Try adding a small logo or script on the tank or tail to make the bike yours.
Detailing and Polishing
The final touches make your bike look complete and unique. Detailing and polishing give it a professional finish and show attention to detail.
Detailing Tips:
- Polish Metal Parts: Shiny metal parts like engine covers, exhaust pipes, and fork tubes add a classic, high-end look to your bike. Use metal polish and a buffing wheel for a mirror-like shine.
- Use Ceramic Coating: Protect your paint and metal parts with a ceramic coating. This adds a strong, water-repellent layer that keeps the shine and guards against dirt, scratches, and sun damage.
- Black Out Some Parts: For a modern, tough look, paint some parts black, like the wheels, frame, or handlebars. This is a popular style in modern cafe racer builds.
- Create Custom Badges: Custom badges can be a great finishing touch. Think about making emblems or plaques that show your bike’s theme or your own brand.
- Get Professional Detailing: When the bike is done, take it to a pro for the final polish. They can give it that showroom shine that makes it stand out.
With the paint and finishing touches done, your BMW K1100 cafe racer will look as great as it runs.
Reassembly and Final Adjustments
With all the changes and upgrades done, it’s time to put your BMW K1100 cafe racer back together. This is when the bike comes to life, and you see all your hard work pay off.
Putting Everything Back Together
Reassembling your bike after custom work takes patience and focus. Follow these steps to make sure everything fits well.
Steps for Reassembly:
- Start with the Frame and Engine: Place the engine back in the frame. This usually needs two people, as it involves careful lifting and fitting. Use the correct torque settings from your manual to tighten the engine mounts.
- Install the Suspension Parts: Put back the front forks and rear suspension. Make sure all parts line up properly. Check the torque for the triple tree clamps, axle nuts, and shock mounts.
- Mount Wheels and Brakes: Attach the wheels and line up the brake calipers. Reconnect the brake lines, check for leaks, and bleed the brakes to clear any air.
- Attach the Wiring and Electrical Parts: Install your new, simpler wiring. Make sure all connections are tight and in the right place. Connect the battery, check all grounds, and test the electrical system.
- Fit the Fuel System and Exhaust: Reinstall the fuel tank, fuel lines, and exhaust system. Make sure all parts are tight and do not leak. Test the fuel pump and injectors to check they work well.
- Install Bodywork, Seat, and Accessories: Mount the seat, body panels, and any extras like mirrors and lights. Make sure everything is securely fastened and aligned.
- Make Final Adjustments: Adjust the throttle and clutch cables, and brake levers. Ensure they move smoothly without sticking or too much play.
Final Tuning and Test Ride
With the bike fully put together, it’s time for the final tuning and a test ride to make sure all parts work well.
Steps for Final Tuning and Testing:
- Check Fluids: Double-check all fluid levels—engine oil, coolant, brake fluid, and fuel. Make sure there are no leaks and that all caps are tight.
- Initial Start-Up: Start the engine and let it idle for a few minutes. Listen for strange noises or vibrations. Check that all gauges and lights are working.
- Tune the Engine: If you have upgraded the ECU or made engine changes, now is the time to fine-tune the engine. Use a dyno or get help from a professional to adjust the fuel, timing, and other settings for the best performance.
- Test the Brakes: Test the brakes in a safe place before riding on the road. Make sure they feel firm and there is no extra play in the levers.
- Adjust the Suspension: Take a short ride to check the suspension settings. Adjust the preload, compression, and rebound as needed for better handling.
- Test Ride and Shake-Down: Take the bike for a test ride to check that everything works. Focus on handling, braking, and any problems that might come up. Make changes as needed.
Your first ride will be special as you feel all the work come together. Take it slow at first to make sure everything is set up right.
Legal Considerations and Registration
After building your BMW K1100 cafe racer, you need to make sure it is legal and safe to ride on public roads. The process for legalizing and registering a custom bike can vary by location, but here are some general steps to follow.
Understanding Local Rules
Different areas have different rules for custom bikes. It’s important to know your local rules to avoid fines, legal issues, or problems with insurance.
Key Points to Consider:
- Inspection Requirements: Many places need a safety check for custom bikes. This can include checks for lights, brakes, tires, noise, and emissions. Make sure your bike meets all local rules before going for an inspection.
- VIN and Frame Changes: If you’ve made big changes to the frame or built a new frame, you may need to re-title the bike as a “special build” or “assembled vehicle.” Check with your local DMV for details.
- Lighting and Indicators: Your bike must have working lights, like a headlight, taillight, brake light, and turn signals. LED lights are usually okay but must meet brightness rules.
- Exhaust Noise and Emissions: Custom exhausts on cafe racers can be louder than standard ones. Check local noise and emissions rules to make sure you follow them. You may need a dB killer or catalytic converter.
- License Plate and Registration: Make sure your bike has a legal place for the license plate with proper lighting. In some places, side-mounted plates are not allowed, so check these rules.
Getting Insurance for Your Custom Bike
Insuring a custom cafe racer can be tricky since not all insurers cover heavily modified bikes. But with some research, you can find a policy that fits.
Tips for Insuring Your Custom Bike:
- Specialty Insurance Companies: Look for companies that specialize in custom bikes, classic bikes, or collectibles. They are more likely to understand what a custom bike needs.
- Agreed Value Policy: Unlike regular insurance, an agreed value policy ensures you get a set amount if the bike is stolen or destroyed. This is important for custom bikes, where the upgrades can be worth more than the base bike.
- Provide Documentation: Keep a record of your build with photos, receipts, and details of upgrades. This will help prove the bike’s value and get better coverage.
- Check Liability Requirements: Make sure your insurance meets the minimum liability rules for your area. You might also want more coverage for extra protection.
- Add Theft and Vandalism Coverage: Custom bikes are often targets for theft because they are unique. Make sure your policy covers theft, vandalism, and damage while being transported.
By making sure your bike follows the law and is properly insured, you can enjoy riding it with peace of mind.
READ MORE: Ultimate Guide to Cafe Racer Insurance: Everything You Need to Know
Conclusion
Congratulations! You’ve built a special BMW K1100 cafe racer. It stands out on the road and shows off your style. This guide took you through each step. You learned how to get your bike, plan your build, add the final touches, and show off your creation. You’ve learned new skills and made something unique.
Now, enjoy what you’ve made. Hit the road, feel the ride, and share your passion with others. If this guide helped you, share it with friends or tell us your own stories.
Ready for your next project? Keep being creative, stay safe, and keep riding!
FAQs
How much does it cost to build a BMW K1100 cafe racer?
The cost of building a BMW K1100 cafe racer varies. It depends on how much you customize, the quality of parts, and if you do the work yourself or hire help. On average, expect to spend between $3,000 and $10,000. This cost includes the donor bike, new seat, exhaust, suspension upgrades, and any professional work or paint jobs. High-end builds with top-quality parts might cost more.
What tools do I need to start a BMW K1100 cafe racer project?
To start a BMW K1100 cafe racer project, you need a well-equipped garage. Basic tools like wrenches, screwdrivers, socket sets, pliers, and a torque wrench are essential. You’ll also need a motorcycle lift, an impact driver, and specialized tools like a bearing puller and engine hoist. Depending on your modifications, tools for welding, painting, and electrical work might also be necessary. Having a BMW K1100 service manual is highly recommended to guide you.
How long does it take to complete a BMW K1100 cafe racer build?
The time it takes to complete a BMW K1100 cafe racer build depends on your experience and the complexity of your modifications. If you have a clear plan, it might take anywhere from 3 to 12 months. A simple build could be done in a few months if you stay focused. More complex builds, with custom fabrication and extensive engine work, could take closer to a year or more.
Is the BMW K1100 a good choice for a beginner cafe racer project?
The BMW K1100 is a strong and reliable bike, making it a good choice for a cafe racer project. However, it can be challenging for beginners due to its weight, complex electronics, and the unique “Flying Brick” engine. If you’re new to bike building, you’ll need patience, a good set of tools, and maybe some help from experienced builders. Despite the challenges, the K1100’s durability and available parts make it a rewarding project.
What are the common challenges in customizing a BMW K1100?
Customizing a BMW K1100 into a cafe racer has several challenges. The bike’s weight makes it hard to achieve the light, agile feel typical of cafe racers. Its complex electronics, including the ABS and fuel injection systems, can be tough to simplify. The wide “Flying Brick” engine design also limits some styling choices, especially if you want a slim, minimalist look. Finding or creating parts to fit this unique engine can also be challenging, but overcoming these obstacles makes for a unique build.
Can I maintain the bike’s original ABS and electronics after customizing?
Yes, you can keep the BMW K1100’s original ABS and electronic systems after customizing, but it requires careful planning. The ABS system is connected to the bike’s wiring and brakes, so if you modify or replace these parts, you’ll need to ensure the ABS still works. Simplifying the wiring while keeping the ABS intact can be tricky. You might need to reroute or extend wires to fit your new design. Similarly, keeping the stock fuel injection and ignition systems will require most of the original electronic components or finding compatible aftermarket options.